
How to Identify Jewelry by Picture: Rings, Earrings & Brands
Identify jewelry by picture: find a ring or earring from a photo, spot a brand from an image, shoot the piece so it can be read, and know what a photo cannot prove.
· Updated · Jewelry Identifier
A photograph is a surprisingly good identification tool and a surprisingly bad one, depending on which question you ask it. It settles object type and construction almost every time. It suggests material, period and a rough value range. It cannot settle composition, authenticity or an exact value, and any tool that tells you otherwise from a single image is guessing on your behalf. The useful skill is knowing which bucket your question falls into before you start.
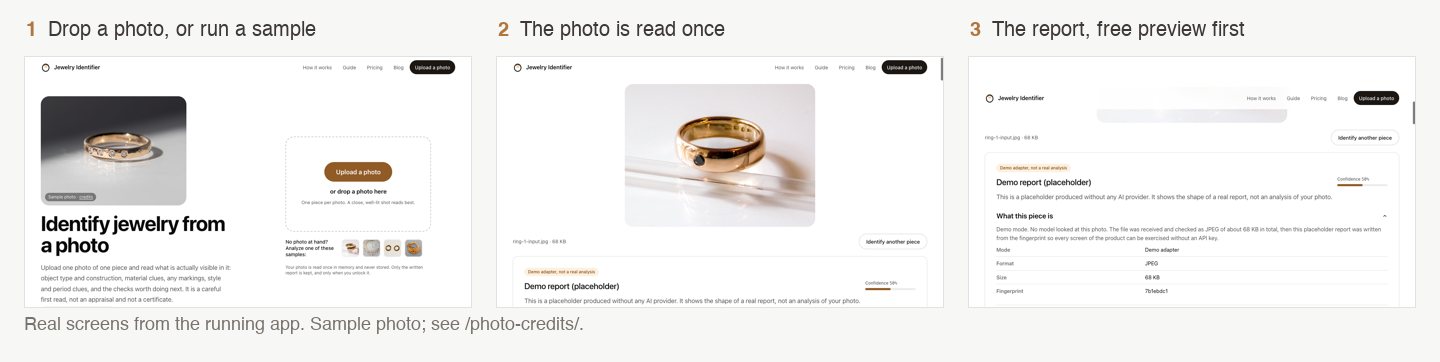
If you have the piece in front of you now, take the photographs described below first and run one through the identifier afterwards — the free preview tells you how usable your picture was, which is the single most valuable thing to learn before you go any further.
What a picture genuinely shows
Object type and construction. Ring, pendant, brooch, drop earring; the shape of a shank, the pattern of a chain, the kind of setting holding a stone, whether a back is open or closed. This is the layer a photograph handles well, and it is also the layer everything else depends on.
Findings and fastenings. Clasps, catches, hinges, pin stems and earring fittings. They are small and unglamorous, which is exactly why they are useful: nobody redesigns a catch for fashion, so it stays a fairly reliable record of how and roughly when the piece was assembled.
Surface condition. Wear at edges and high points, discolouration where a plating has thinned, patina sitting in recesses, solder lines, a join where two metal colours meet, a shank that has been sized with a different alloy.
Markings, when they are in the frame and in focus. A photograph can transcribe what is legible, describe the shape of each punch and say where it sits. It cannot recover a character that is worn away, and it should never invent one.
Style vocabulary. Silhouette, symmetry, motif, stone cut, setting technique. Enough to name the design families in play.
How to identify jewelry brand from an image
Can you identify a jewelry brand from an image alone? Often, yes—provided you photograph both the exterior design motif and the inner stamp marks:
- Signature brand motifs: Certain luxury jewelers created silhouettes so iconic they serve as visual fingerprints: Van Cleef & Arpels’ Alhambra four-leaf clover, Cartier’s Love screw head motif and Panthère silhouettes, Bulgari’s Serpenti coiled snake scale, or David Yurman’s Cable twisted helix band.
- Brand name typography and logo marks: High-end brands stamp clean, laser-cut or die-struck logos on ring shanks, clasp plaques, and earring clips. Look for the exact typographic font used by the house (e.g., lowercase scripted “tiffany & co.”, all-caps serifs, or geometric cartouches).
- Serial numbers and copyright dates: Luxury houses virtually always engrave individual serial numbers alongside metal fineness stamps (e.g., “750” next to a 6-digit unique serial on a Cartier band).
- Beware of cosmetic imitations: Because high-end motifs are frequently counterfeited, a brand motif in an image only indicates brand attribution candidate. Authentic pieces must back up the design with impeccable hand-finishing, flawless stone alignment, and correctly struck assay stamps. Read our guide on identifying jewelry maker’s marks and hallmarks for in-depth stamp analysis.
Find a ring or earring by picture
Two different questions hide behind “find this earring from a picture”, and they need different tools.
“Where can I buy this, or one like it?” That is a shopping search. A reverse image search such as Google Lens matches your photo against product listings and is the fastest way to find a retailer selling the same design. It works best on current, mass-produced pieces and falls apart on anything vintage, handmade or worn.
“What is this piece I already own?” That is identification. A product match will not tell you whether a hoop is gold or gold plate, whether the stone in a ring is a diamond or a simulant, or roughly when a clasp style was in use. For that you need a reading of construction, findings, markings and style — which is what the jewelry identifier does from one photo.
For earrings, photograph the fitting as well as the front: post and butterfly, lever-back, screw-back, clip and French hook each have their own history, and a single earring is far easier to date by its back than by its face. For rings, shoot the inside of the shank, where karat stamps, maker’s marks and sizing repairs sit, plus a side view of the setting so the claws or bezel are visible.
What a picture cannot settle, ever
Metal purity is invisible. Colour tells you a metal is yellow or white, not what it is made of — yellow covers gold, gold plate, gold fill, brass, bronze and gilt; white covers silver, white gold, platinum, palladium, steel, rhodium plate and base alloys. Intact plating over base metal photographs identically to solid metal.
Stones are worse. A lab-grown stone and its natural equivalent are the same material and look the same under any camera. Glass and paste sometimes give themselves away with bubbles, swirl marks or softened facet junctions, but sometimes they do not. Treatments do not photograph at all — see our guide on how to identify jewelry stones for optical clues that help.
Authenticity and attribution need the piece, its marks and the reference literature together. An exact value depends on composition, condition, provenance and a market on a particular day — none of which are in the frame. What the frame does support is an estimated range from visible features; use the jewelry value estimator to understand market comparables, or consult the jewelry appraisal guide when you require a certified legal or insurance valuation.
Shoot it so it can be read
Jewelry is small, curved and reflective, the three things cameras handle worst. Four habits fix most of it.
Soft daylight, flash off. Near a window on an overcast day is ideal. Flash blows out a polished surface and turns a stamp into a bright blank patch — the exact detail you need, erased. Indoors after dark, two lamps at an angle beat one overhead.
A plain, matte background. Paper, unpatterned cloth, bare wood. Not glass, not a mirror, not your hand — skin drags the white balance and changes how the metal reads.
Fill the frame. The piece should occupy most of the picture. Tap to focus on the piece itself, not the surface behind it, and take three shots so you can keep the sharpest.
Shoot the back separately. One overall photo plus close-ups of the clasp, the hinge and catch, the inside of the shank, and any stamp you can find. If size matters, put a coin or a ruler edge in the corner: “about 4 mm” is an observation, “small” is not.
Glare is beaten by moving the piece, not by editing afterwards. Rotate it a few degrees and shoot again; the angle where the metal stops burning out is usually a small turn away from the one where it does.
Reading a result without over-reading it
A good identification report is written in layers, and they deserve different amounts of trust.
Observations — what is in the frame — are the firm layer. If the report says “six-claw setting, single transparent colourless stone, yellow metal, mark present on the inner shank”, you can check each of those against your own eyes and should.
Interpretations are the soft layer, and they should always arrive with alternatives attached. “Consistent with gold” is a useful sentence; “gold” is not. If a reading never names what else would look the same, it is telling you less than it appears to.
Confidence is how strongly the visible evidence supports the identification, not a probability of being right and not a grade for your photo. It sits next to a separate judgement of the photograph itself, and the two move independently: a beautifully lit shot of a plain unmarked band earns high photo quality and modest confidence, because there is little in the frame to reason from.
Read both numbers with the caveats. A confidence of 60 beside “the underside was never in the frame” means one more photograph will probably settle it — that is a five-minute fix. The same 60 beside “this cannot be distinguished from a photograph” means the answer was never in the picture and the next step is a person holding the piece.
The list of next checks is the part that actually earns its keep. A gram scale, a 10x loupe, a magnet, a jeweller, a gemmologist, an assay office, an independent appraiser — each answers a different question, and each costs something. A careful reading of your photo is worth having mainly because it tells you which of them to spend on.
Working through a piece yourself
Name the object type. Describe the construction without interpreting it. Turn it over and study the findings. Hunt for marks on every plausible surface before concluding there are none — they hide under clasp tongues and inside bails. Read the surface wear. Only then start interpreting, and for every clue ask immediately what else produces the same appearance.
Then write down what would change your mind. An identification you cannot argue against is a guess with a confident voice.
If your piece has a stamp on it, identifying jewelry maker’s marks and hallmarks covers what the separate punches are doing. For older brooches, clasps, and period construction, see how to identify vintage jewelry.
The honest summary
A photograph narrows the field. It tells you what kind of object you are holding, how it was put together, what its surface has been through, what its marks appear to say and which design families it belongs to. It hands you a short list of specific open questions instead of a vague sense that you should probably “get it looked at”.
That is not an appraisal and it is not a certificate, and it should not pretend to be either. It is the step before those — the one that makes sure the expensive opinion you buy later is bought for the right question. Upload one photo and start with what is actually visible.